Call of Duty: Black Ops
Unreal Engine 5 || Solo Multiplayer Project
6v6 Multiplayer Project
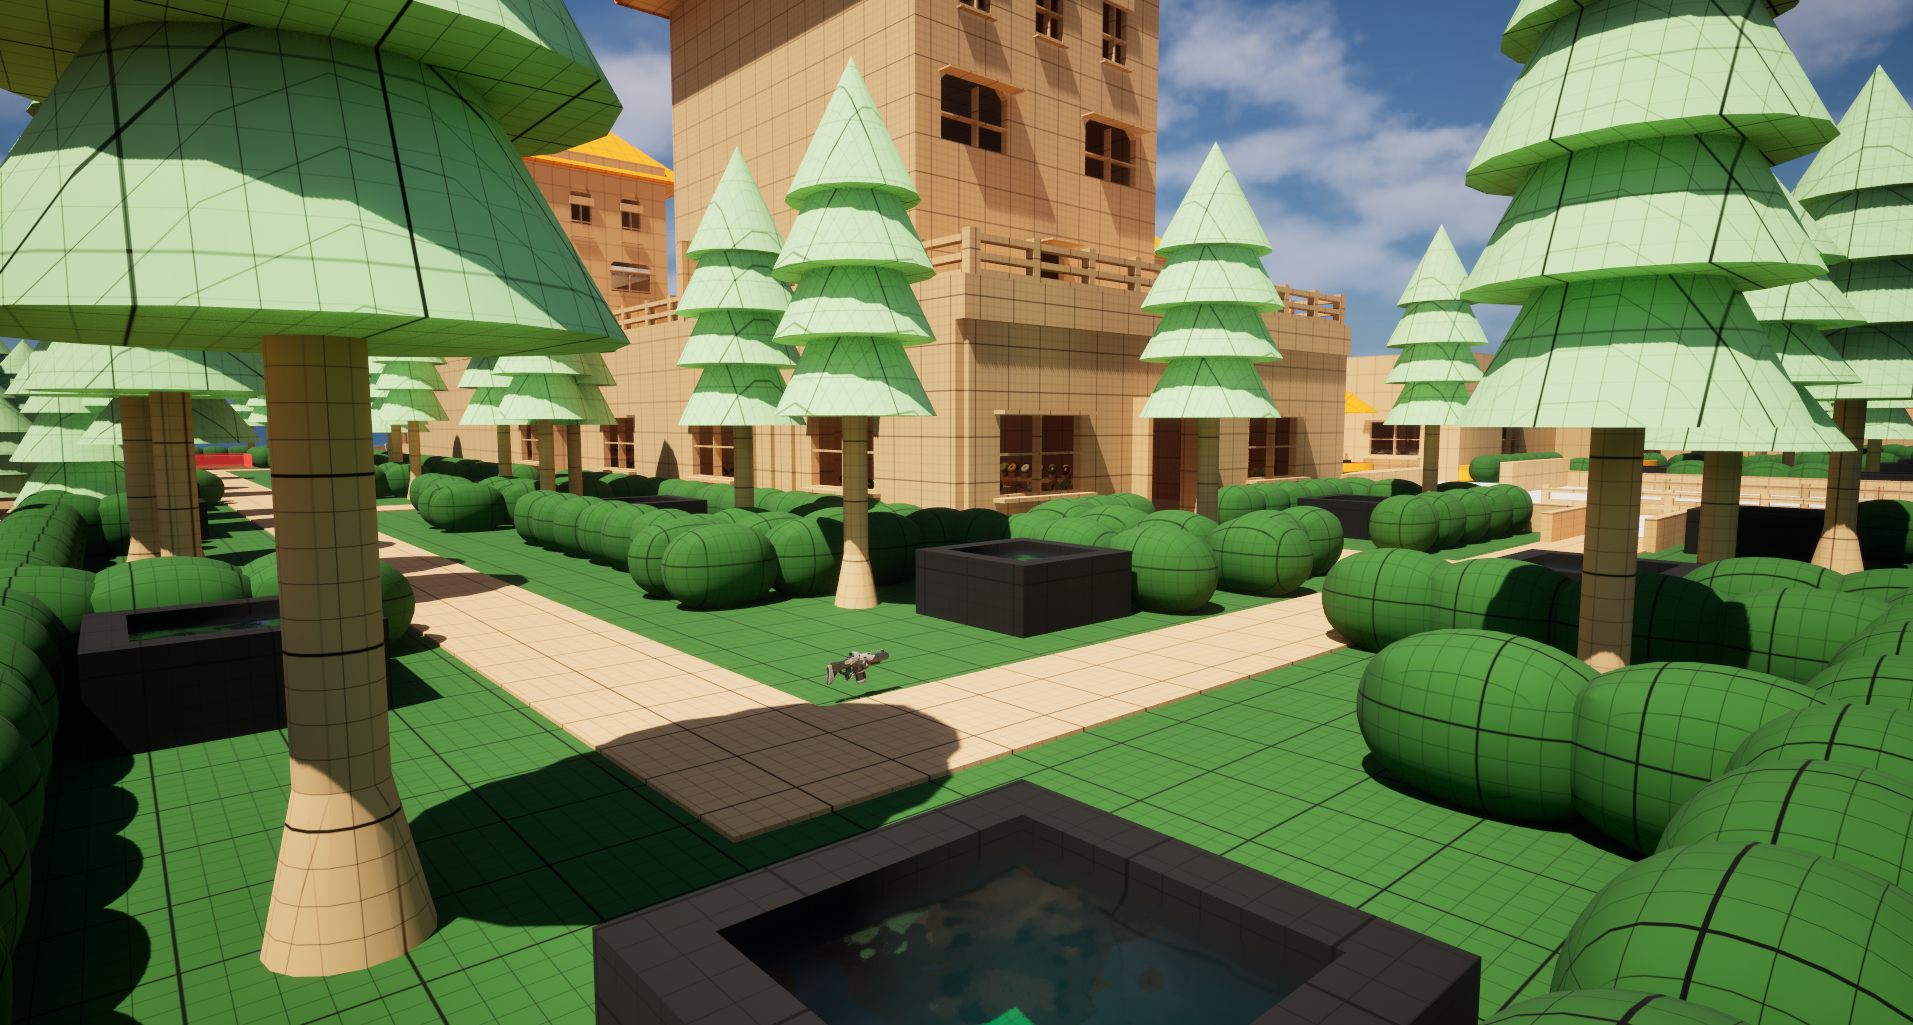
About the Level
Developed over 2 weeks in Unreal Engine 5.5
Competitive 6v6 Domination map
Built entirely with modular blockout geometry
Tools: UE5 Modeling Tools, Blueprints, Illustrator, Photoshop
Design Goals
Capture the pacing and structure of Raid and Hacienda
Emphasize tight combat flow, power positions, and flanking routes
Support Domination objectives with strong lane clarity
Guide players using readable sightlines, POI markers, and flow-friendly layout
2D Map

Lane Design Analysis
Left Lane
Left Lane (Red to C / Blue Flank to C):
Designed for early Red control with fast access and immediate cover. Blue's delayed entry allows for late-round flanks and surprise pressure, creating a shifting control lane. Cover placement emphasizes mid-range fights with staggered angles and clear flow cues.


Center Lane
Center Lane (Mid Fountain / B Flag):
Built as the core contest zone with wide sightlines and multiple vertical access points. Mid is intentionally risky—teams must earn control through timing and coordination. Red has a slight elevation advantage; Blue’s tunnel approach offers protection but delays their entry. This lane drives the match tempo.


Right Lane
Right Lane (Blue to A / Red Flank to A): Offers fast Blue-side access to A with open geometry and light cover, rewarding quick pushes. Red’s longer wrap creates a late-power retake angle, giving the lane a shifting dynamic. Designed for high movement, rotation plays, and trade-heavy fights.


Metric Measuring for Multiplayer
Red Spawn → C Flag
Time to C: ~6 seconds
First Cover: Reached in ~2 seconds to prevent spawn peeking
Lane Layout: Subtle S-curve with staggered walls and planters to limit long sightlines
C Flag Placement: Located inside a garden shed, requiring players to round the final corner before capturing
Flank Route: Runs parallel on the right; visible from spawn-side but takes ~9 seconds—encourages early decisions and pressure plays
Red Spawn → A Flag
Time to A: ~18 seconds
Primary Route: Long wrap through a side alley garden, offering staggered cover sparce cover
Sightline Control: Early sections are tight with limited visibility, but the final approach opens into A’s courtyard, requiring strategic use of cover
A Flag Placement: Set in a locker room with solid walls—strong for defenders but exposed from multiple angles
Strategic Use: This route supports delayed flanks and control plays, trading speed for a stronger approach angle
Red Spawn to C Domination Flag
Red Spawn to B Domination Flag
Blue Spawn to A Domination Flag
Blue Spawn → B Flag
Time to B: ~15 seconds, slightly slower than Red's approach
Route Layout: Sloped tunnel leads into mid fountain area, exiting at a lower elevation than Red side
Sightline Risk: On exit, Blue players are exposed to Red’s mid balcony—creating a natural disadvantage
Design Reflection: This asymmetry introduces early pressure for Blue, encouraging flanks or coordinated pushes. In future iterations, I’d explore soft cover placement or timing offsets to balance initial B fights
Red Spawn → B Flag
Time to B: ~15 seconds
Initial Path: Snakes through the house providing a covered route but with many angles to be flanked
Engagement Zone: B-Site serves as first major contest space—sightlines open up, with limited hard cover
Player Choice: Push directly into B through mid (fast but risky) or rotate wide through flank hall for safer entry with more cover
Red Spawn to A Domination Flag
Blue Spawn to B Domination Flag
Blue Spawn to C Domination Flag
Blue Spawn → A Flag
Time to A: ~7 seconds—faster access than Red side
Route Layout: Direct line through an open plaza with light cover
Sightline Risk: Quick path comes at a cost—players are exposed to long-range fire from mid if not careful
A Flag Placement: Set in a recessed locker room area off of the basketball court
Design Reflection: Blue’s faster access gives them early control and decent cover, but open angles make holding it a challenge. In future balance passes, I’d explore giving Blue side faster alternate access or adding a soft stall for Blue’s initial push
Blue Spawn → C Flag
Time to C: ~16 seconds—longest of the three flag routes for Blue
Route Layout: Winding path through flank hall and outer corridor, with scattered cover and multiple turn angles
Sightlines: Limited visibility until final approach, where the shed opens up to multiple entry points
C Flag Placement: Positioned inside a small garden shed—defensible but vulnerable to multi-angle breach
Design Reflection: Blue’s delayed access gives Red early control, but the longer path supports flanks and late-round pressure.
Playthrough
First Pass Blockout


Latest Blockout